Detecting and addressing damage quickly can prevent structural problems and ensure that the deck is safe to use. Inspect for rotted and decaying wood, and fix these areas as soon as possible.
Small fixes like replacing a few loose boards might be doable as a DIY project, but extensive repairs or replacement should be left to professional contractors. Discover More Here by reading the article below.
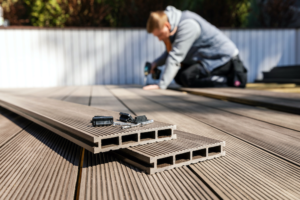
A thorough inspection is the first step in any deck repair. Look for loose boards, rusted hardware, sagging or warping decking, and signs of insect infestation or extensive wood rot. If the sagging or warping is severe, you may need to install angle bracing. In some cases, the underlying joists and beams might need to be repaired or replaced altogether.
Loose boards are a serious safety hazard, so you should replace them right away. In addition to providing a less stable surface, they can also expose you to mold and mildew, which should be addressed immediately. Inspect the surface of each board for splinters, which can create a rough and uncomfortable walking surface that could lead to injury.
You should also check that the concrete footings provide a solid base support for the deck, and that all support posts are in good condition. Look for any cracks or shifting of the foundation, and make sure all posts are at least six inches above the soil to prevent moisture exposure, which can cause rot. You should also inspect joist hangers and span braces to ensure that they are securely attached and do not show signs of rust or other damage.
Wood rot is one of the most serious problems that can affect a deck, and it can be difficult to spot early on. A common sign is a spongy feel to the decking. In advanced stages of rot, the boards can begin to crumble and break apart, leaving you with an unsafe and unstable structure.
Other common problems include loose railings, rotted-out deck boards, and a general feeling of instability or swaying. You should address these issues immediately to reduce the risk of further structural damage and ensure that your deck is safe for use.
You should also look for any signs of insects, such as sagging or warped wood that has been chewed by termites. If you see any evidence of a pest problem, you should treat the area with insecticides and seal any entry points to prevent further infestations. You will also need to inspect your tools to make sure you have everything you need to complete the job safely and correctly.
Removing the Damaged Sections
Decks endure a lot of stress from weather and heavy foot traffic. These conditions can lead to cracks, splinters, and even rot. Over time, these problems can become a safety hazard for family members and can lead to costly repairs or replacement. Keeping up with regular maintenance can prevent this type of damage and make your deck a safe place to relax and entertain.
Before deciding whether to repair or replace your deck, it is important to determine the scope of the problem. If the damage is limited to one or two boards, patching may be sufficient. However, if the structural integrity of your deck is compromised, it’s best to take a more comprehensive approach. Loose or wobbly boards can become a tripping hazard, and the underlying supports (known as joists) may be rotten and unstable. In this case, the joists should be replaced immediately to avoid collapses and further damage.
To determine if the joists need to be replaced, carefully remove the existing boards and use a reciprocating saw to cut away the damaged portions of the joists without harming adjacent planks. Once the joists are exposed, they can be checked for rot. If necessary, they can be cleaned and retreated before installing new boards.
After removing the damaged sections of your deck, it’s important to dispose of the waste material correctly. Many types of deck materials contain chemicals that require special disposal. Contact your local hazardous waste guidanceline to find out the best way to handle this step. Options may include renting a residential dumpster or taking the debris to a local waste management facility. Repurposing or recycling the wood from your deck rebuild can also be a good option, helping to reduce waste and minimize the impact on the environment. In addition, reusing old materials helps to keep your project costs down. This can be especially helpful if you are on a tight budget. Alternatively, you can hire a professional waste removal company to handle the entire process. This can be a more cost-effective solution, particularly if the waste material is very large or heavy.
Installing New Boards
A well-maintained deck adds beauty and function to a home, but damaged sections can make the entire area unusable. Depending on the severity of the damage, some issues may require complete replacement, while others can be repaired with just a few patching jobs.
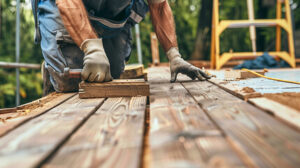
The first step in any deck repair project is to remove the affected boards. Using a crowbar or similar leverage tool, carefully pry the boards loose and pull them away. You should have a clear view of the deck’s structure underneath, so be sure to check for signs of rot or insect infestation. In some cases, it may be necessary to treat the wood rot with a fungicide or epoxy filler or even replace entire boards.
Once the old boards are removed, you can begin preparing to install new sections. If the joists under the deck are in poor condition, it is important to reinforce them before continuing. Use a screwdriver or other probe to gently test the joists for softness, which could indicate hidden decay or insect activity.
If the joists are in good shape, prepare to install new boards by cutting them to size with a circular saw and marking the cutting line with a speed square. Use the joists as a guide to position your new boards correctly, ensuring that the ends rest flush against each other for optimal support. Nail or screw the new boards to the joists, being careful not to over-tighten or damage the deck structure in the process.
Deck repairs can be time-consuming and challenging for DIYers. If you are not comfortable working with large quantities of wood or don’t have the proper tools, it may be best to hire a professional. They can help ensure the job is done correctly and safely, and may even offer a warranty on their work.
A damaged deck can be a major safety hazard, so it is important to address the problem as soon as possible. With a little knowledge and the right preparation, you can successfully fix damaged deck boards yourself and enjoy your outdoor space again.
Finishing Up
A well-crafted deck is much more than just a place to relax in the garden, it’s an extension of your living space, a gateway into the outdoors, and the perfect spot to enjoy a meal or cocktail. But as with any part of your home, a deck will need to be repaired and maintained in order to keep it looking its best.
Decks are subject to a lot of wear and tear, and it’s not uncommon for rotten boards or joists to develop. When this happens, the deck can lose its structural integrity, causing it to sag or buckle over time. Fortunately, there are a few simple steps that can be taken to fix this issue and restore the integrity of your deck.
Begin by removing any furniture or garden plants from the deck and carefully inspecting the surface. Check for signs of damage such as splinters, loose boards and cracked or chipped concrete. Also take this opportunity to look at the fasteners and screws securing your deck to your house. Replace any rusted or damaged ones and make sure that they are properly tightened.
If you notice any areas of discoloration or rot, begin the cleaning process by using a power washer with a nozzle that’s large enough to penetrate the wood fibers and remove any buildup of dirt, mildew, mold or other debris. Then rinse the surface and allow it to dry completely.
Once your deck is clean and dry, it’s time to refinish it with a stain or sealant. This will help protect the wood from future damage, allowing it to last longer and keeping your Deck looking its best for years to come.
When applying a new coat of stain, be sure to back brush it to work the finish into the wood grain, end gaps and seams as you go. Remember that some stains require more than one coat, so be sure to read the label and data sheet carefully.
Once your Deck has been restored, it’s important to keep up the maintenance with regular cleaning and reapplication of stain or sealant to keep it looking its best. With proper care and regular inspections, your Deck will continue to serve you for years to come!